
Do-it-yourself projects can transform not just spaces but also empower homeowners with skills and confidence. Among various DIY options, self adhesive floor tiles offer an attractive blend of simplicity and versatility for those looking to personally revamp their living spaces. Whether you are a seasoned DIY enthusiast or a first-timer, these tiles provide an opportunity to achieve professional-looking results with minimal effort. This article delves into how you can master the art of laying self adhesive floor tiles and bring your DIY decor dreams to life.
Understanding Self Adhesive Floor Tiles
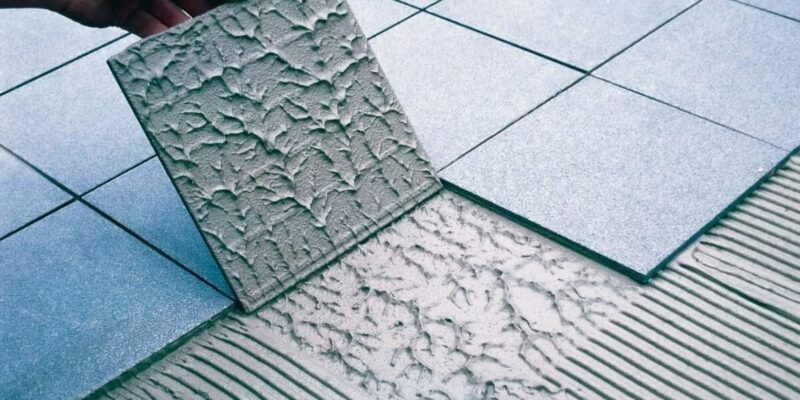
Self adhesive floor tiles are made from durable materials like vinyl and come with a pre-applied adhesive layer covered by a protective backing. Once this backing is peeled off, the tiles can be directly stuck onto the floor surface. These tiles are available in various designs, mimicking the look of hardwood, stone, or ceramic tiles, providing aesthetic flexibility for any design scheme.
Preparation is Key
Getting the Surface Ready
The success of installing self adhesive floor tiles lies in the preparation of the subfloor. Ensure that the floor is smooth, clean, and dry. Any dust, debris, or moisture can hinder the adhesive’s ability to stick properly, leading to tiles that may lift or move. For concrete floors, filling any cracks or holes is essential; for wooden floors, ensuring that the surface is even and free from protruding nails is crucial.
Measuring and Planning
Before peeling off any backs, it is important to plan the layout of the tiles. Measure the room and plot out where tiles will need to be cut to fit around edges and corners. Consider the visual impact of the tile placement—starting from the centre of the room can help achieve a symmetrical pattern that enhances the room’s aesthetics.
Installation Process
Sticking the Tiles
Begin at the centre of the room or at one end, depending on your layout plan. Peel the backing off the first tile and carefully place it on the floor, pressing down firmly from the centre outwards to avoid air bubbles. Continue this process, making sure each new tile is snug against its neighbours. Use a utility knife for any tiles that need trimming, ensuring cuts are clean and precise.
Rolling Out the Edges
Once all the tiles are placed, going over the floor with a roller can help secure the adhesive and ensure each tile is flat and tightly sealed at the edges. This step is crucial for avoiding any edges lifting over time, which could compromise the durability and finish of your flooring.
Post-Installation Care
Maintaining self adhesive floor tiles is straightforward. Regular sweeping and occasional mopping with mild detergents are sufficient to keep the tiles looking new. Avoid using abrasive cleaners that can wear down the finish.
Conclusion
Mastering the art of laying self adhesive floor tiles is within reach for most DIY enthusiasts. With good preparation, careful planning, and precise execution, you can transform any room with a stunning new floor that is both stylish and durable. Embrace the challenge and enjoy the process of creating a beautiful and functional space that reflects your personal style and craftsmanship.


Comments